CLICK HERE FOR FREE BLOGGER TEMPLATES, LINK BUTTONS AND MORE! »

Wednesday, March 2, 2011

Fun Finds!

Check out this Fun Find for today, it's a housewife essential, it's fun, and even if you aren't an excellent cook, who wouldn't be inspired to whip up something tasty in this awesome apron?!


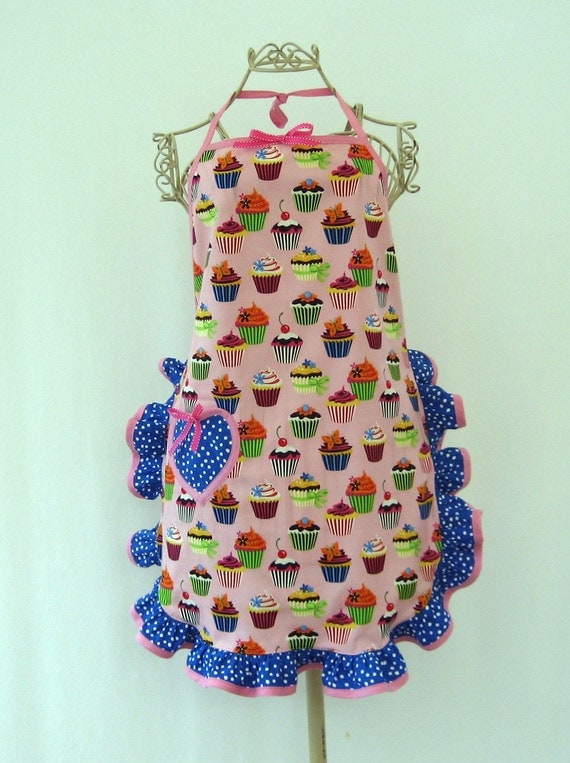
click on image for the link to etsy


You can find tons of variations of these on Etsy that people have made, but I'm sure with an easy pattern from the fabric store or somewhere online this would be something really fun to make!

Monday, February 28, 2011

Pajama Time!


Whoa, it's been a whirlwind of a week/weekend for me, but I wanted to post this great gift idea that I think lots of you could do (well, those of you with just a little bit of sewing experience).


I spent almost all of January, okay, some of January, making my very first item of clothing, from a pattern: Pajamas!

Now who doesn't love pajamas? And it gets even better, they were kid's pajamas! I had a certain adorable little boy in mind when I made these for a gift, and it turns out I didn't have to be so scared of this pattern after all. Check out the results!


The only other thing I have ever used a pattern for is a jacket for a small dog. It was my very first sewing project ever, and it turned out terrible. Since then I have, for the most part, just navigated my way in sewing without patterns, and I hadn't ever attempted to make actual clothing, maybe just adorn pre-made clothing with appliques. But this, THIS was different! It was like the first time I made cookies from scratch and realized, Wow! I can really do this!

Here is the pattern I used:


If you click on the image, you can see it is available on Amazon, but I am sure you can probably find it or something similar at a fabric store. It was a fairly easy to follow pattern (not that I have followed many patterns before anyway!) but for me it certainly wasn't "fast". I would say that I will try this pattern again, most likely the variation for the girl's nightgown.

If you decide to try this, or if you are thinking about making another piece of clothing from scratch, here are some tips:

1) Make sure you have enough fabric and the correct type of fabric, sometimes the pattern tells you to buy something else called "interfacing". You should buy it and use it. I didn't however, because that's just my style, I thought I could just wing it and be cool, but I probably should have just listened to the directions :)

2) Press your seams and folds with your iron, I had never done this before and always wondered why my stuff looked sloppy....once again, it's just a following directions thing for me. In this area I did, and it helped tremendously!!

3) You may need help from your significant other or another male in your life, because sometimes it takes an architechtual mind to figure out how to sew something inside out and have it make sense once you turn it right side out! The pictures in the directions are nice, but not perfect

4) Don't be afraid of the buttonhole maker on your sewing machine, YouTube how to use it if you don't already know how, it's waaaaaaaay easier than you think!


So there you have it, I made something with my sewing machine that I have never made before! It was a roller coaster ride of emotions, but I am so glad I tried something new, it taught me so much. I've said it before and I'll say it again, just go for it! If there's something you want to try don't worry about it being perfect, just go ahead and do it!

Happy Sewing!!


Monday, February 21, 2011

Pancake Muffins


Some of you may have seen these before, as they have been all over the blog-o-sphere recently. Bakerella first posted this as a featured sweet, but the recipe I used was a modification I found on Baked Bree . Here they are:

Absolutely hands down magically delicious! I made mine regular muffin size, but they still turned out great and made the perfect addition to our "breakfast for dinner" dinner the other night.

Here's a quick recap of the recipe:


1 cup flour
1 teaspoon baking powder
1/2 teaspoon baking soda
1/2 teaspoon cinnamon
1/4 teaspoon salt
2 tablespoons sugar
2/3 cup buttermilk
1 egg
2 Tablespoons pure maple syrup
2 Tablespoons melted butter
1 teaspoon vanilla
1/2 cup milk chocolate chips

Glaze:

1 cup powdered sugar
2 Tablespoons pure maple syrup

Bake at 350 for 8 minutes (mini) or 12-14 minutes (reg. muffins)


This recipe is technically for mini muffins, but as you can see I made them regular muffin size and cooked them a bit longer and they tasted great. I also love the added powdered sugar that Baked Bree chose for the glaze (the muffin in my photo was pre-glaze). I also used mini chocolate chips instead of regular. Either way, this recipe is easy to tweak and modify and will taste great. You can eat them for breakfast or dinner, or a party, or anytime!! I love them and will continue to make them :)

Friday, February 18, 2011

Make your own hair clips!


In my previous post I mentioned that I had made a cute little rainbow hair clip for my daughter's rainbow first birthday party and that I would tell you how to make them.

The good news is, that time is now, and this project is incredibly EASY!

Here are a small list of supplies you will need:

1) hot glue gun
2) metal double prong clips like these pictured below, you can find them at most beauty supply stores and some discount stores
3) ribbon of your choice, preferably something not too much wider than the clip, purchase your clips first so you have a guidline
4) scissors


Now the process is fairly easy. You'll need to fire up your hot glue gun, and always remember to be careful because it is really HOT! Then, take one end of the ribbon, open up the clip, and place it inside the clip, with the end closest to the hinge. Close the clip so the ribbon is stuck inside, and then dab a little hot glue while wrapping the ribbon around the outside of the entire clip (yes even over the hinge part so you can't see it), and then back inside the clip. You can then trim the ribbon at the hinge again and you're done! You can also begin like I mentioned above, and without the hot glue wrap the ribbon around the clip and cut before you start glueing to get a better measurement. When your finished it should look something like the images below. You should be able to pinch the side with the hinge, open the clip, and clip it into the hair.

My daughter is only one and doesn't have much hair yet, so it's only on rare occasions that she will wear these, but with the amazing selection of ribbon out there I know I will have fun making more of these for when she's older. I even found this fun vintage ribbon listing on etsy!

If you are daring or extra crafty you can even add buttons, extra bows of ribbon, felt, or fabric flowers.

Thursday, February 17, 2011

It's a Rainbow Party!

This February my daughter celebrated her First Birthday, and in my family that means a HUGE celebration with family and friends!

This party was near and dear to my heart, not only because Lucy is my only little girl, but because this birthday party was going to be the first party that I have planned and created from start to finish! I actually picked a theme and started planning what I would make when Lucy was only 4 months old. I was a little nervous and wanted to make sure everything turned out! So let me give you a quick photo tour of all the crafty things I made for this special little lady's day:

The party theme was Rainbows! So here you can see I utilized felt and tacky glue to make a door hanging greeting guests at the door.
photo courtesy of Jo Brock Photography


I found a genius idea on what to do for the cake, I found these on Spearmint Baby last summer and decided it would be perfect to make rainbow cupcakes for a party where there are lots of kids! I used the gel food coloring to get the colors so bright.
photo courtesy of Jo Brock Photography


Now for the very special guest I had planned to order a cute little tulle tutu in rainbow colors, but the budget didn't quite allow, so I took a plain white onesie, some of my scrap fabric, Heat n Bond, and sewed a rainbow-type applique! I also made the little baby leg warmers she is wearing (see previous blog I posted on how to make those). And what you can't see is that I also used ribbon to make her a rainbow hairclip. I will post an upcoming blog on how to make those!
photo courtesy of Jo Brock Photography


Here's my sweet girl enjoying her delish rainbow treat! She loved it!
photo courtesy of Jo Brock Photography


For the table I just bought paper goods from Party City in different colors, and used vases/bowls/containers I had in different colors. On the menu: marshmallow pops, fruity pebble treats, rainbow jello, chips, bananas, blueberries, apples, carrots, broccoli, cauliflower, with some snack/display containers with Trix cereal, Fruity Cheerios, M&Ms, Skittles, and Gummy Bears! And of course, the rainbow cupcakes!


As another fun addition to my rainbow theme I used some old ice cube trays, food coloring drops, and made some rainbow ice cubes to plop into the Sprite and water we were serving for drinks!
photo courtesy of Jo Brock Photography


The party was so much fun, and it was just as much fun to plan! We also had an extra table with coloring books for an extra activity for the kids, and I would have had a game or two, but for a first birthday it was more practical to keep it short and sweet. It was great to celebrate with our friends and family, and I know Lucy enjoyed it!

A close friend of mine took some of the pictures above, and has a photography business. Check out her blog at Jo Brock Photography.


Wednesday, February 16, 2011

Fun Finds!


Check out this amazing post today on Design Sponge. It is all about the uses for vintage and antique keys!

The reason I love this Fun Find so much, is that it is giving me some simple, inexpensive, and easy ideas to create things in the future. I also have the best time going to thrift stores and antique shops, but very rarely know what to look for (other than keeping an eye out for salt and pepper shaker sets that I love collecting). I think next time I will certainly be looking for keys!

Tuesday, February 15, 2011

Leg Warmers


Before my second child was born I learned to sew something that would prove to be one of the most awesome things I could have learned to make for a baby/toddler! I learned how to sew my very own leg warmers, just like these called Baby Legs by brand name. As you can see (or if you are already a mom, then you know) that these name brand versions of these cute little leg/arm warmers are NOT CHEAP! So that is why I am so glad I have learned to make my own.
Now if you want to know how to make these yourself there are plenty of sites that show pictures in detail on the few specific steps (and even a few videos I found), unfortunately all I have are photos of mine finished. I can however give you a quick run through of what to do:

-First cut off the toes of the socks and discard
-Cut off the heal and discard
-This leaves you with the long "tube" part of the original sock and rectangle part of the "foot"
-Fold the "foot" triangle with wrong sides together to form the cuff
-Using a sewing machine (or hand sewing if you are patient or without machine) slide the cuff over the sock so the raw cut edges are both pointing in the same direction, and sew a stitch all the way around
-Turn the cuff down and the raw edges should be on the inside, where you can't see them, leaving you with cute little leg warmers!!


Here are some helpful tips to remember:

1) Look for women's socks, and depending on age look for these variations - Newborns-6m : women's tube socks or girl's knee socks - 6m-Toddler: women's knee socks
2) You can make these for boys too! Just look for socks that are in more boy-friendly colors or patterns
3) Don't look for fancy or expensive socks, look in the clearance section, or discount stores, I have gotten 3 pairs for $3 in the past!
4) When you finish and try them on your child, put them on like the original sock, which means the cuff you sewed is the bottom and goes near the foot (I say this because my husband always puts my daughters on upside down and they fall down!)

Monday, February 14, 2011

Happy Valentine's Day!


So it's Valentine's Day today, and I thought I would share with you a simple and lovely dessert that anyone could fall in love with:


Mini Cherry Cheesecakes
The recipe I found the other day while browsing Bakerella's site and thought it would be the perfect addition to our family Valentine's meal that we had last night. Here's a breakdown of the super easy recipe:

2 pkg. (8oz.) cream cheese, softened to room temperature
3/4 cup sugar
3 eggs
1 Tbsp vanilla
1 Tbsp lemon juice

Mix.

vanilla wafers
2″ aluminum mini baking cups
Cherry Pie Filling

Place a vanilla wafer in the bottom of each mini baking cup.

Bake at 350 for 15-20 minutes, cool and then top with cherry pie filling.

Tips:
-When the recipe calls for "room temperature" cream cheese, you might want to slowly warm it in the microwave at 50% power, or let it sit out for awhile to make sure it's extra creamy and soft or your cheesecake mixture won't mix very well and be chunky.
-I just used whatever foil baking cups the store had, they fit my muffin tins, but this recipe is actually for "mini" cheesecakes, but I just cooked mine a little closer to 20min, and it made 24 instead of this recipe's intended 48. But who really wants 48 of these devilish things just hanging out at your house!!

So go ahead and try this recipe sometime! If you are a cheesecake lover like me, you will find any excuse or holiday to make/eat/devoureverysinglemorsel.......

Okay, you get the point, happy baking!


Sunday, February 13, 2011

Fun Finds!


Today's Fun Find is something one of my dear friends just found that I thought I would share with you because it is all about felt! Check it out here at Modern Kiddo . It shows you where you can find patterns to make your own felt food for your little ones, and also a few links to etsy where you can purchase pre-made felt food. Some of this play food is absolutely adorable!!


Saturday, February 12, 2011

Fun with Felt!

In 2009 when I found out I was pregnant with a girl, I was soooooooo excited!!! I had spent 5 years with a little boy, digging in the dirt, watching him eat his own boogers, and watching episode after episode of Thomas the Tank Engine and Bob the Builder.

Needless to say I was certainly ready to girl it up for my daughter's nursery! I was on a tight budget, so I figured I would decorate with felt. Felt is slowly becoming one of my ultimate faves, it is super super cheap, and you can get it by the yard at the fabric store or by the square at places like Wal-Mart. And you don't always have to use a sewing machine or even sew at all, it works really well with craft glue.

The supplies I used for this project:

1) Felt by the yard (brown and green)
2) Felt squares in bright colors
3) Scissors
4) Tacky Glue
5) Pipe Cleaners
6) Double sided foam tape - to adhere to the wall
Optional:
Sewing Machine (only for the tree below, not required)
Hand-sewing needles and thread

My inspiration was a piece of scrapbook paper I found while taking a trip to Michael's (you will see the picture below), and I just decided to create some simple shapes with felt to adorn her walls:

A little blue bird

I made the tree on my sewing machine, used polyester filling, and then hand -sewed the flowers onto the tree. In addition to the two little bluebirds I made two butterflies.


My Mom even got in on the crafty-ness and created some custom art for my daughter's room!


And here is the inspiration, a piece of scrapbook paper by Imaginisce called Twitterpated Hey Foxy.

So if you have children, felt is an easy and fun way to create something custom to decorate their walls. You can literally create whatever your mind can imagine, and if you totally screw up, you won't be throwing away a small fortune :)


Friday, February 11, 2011

Cute Cute Cute!


I absolutely love anything Japanese! Even my husband was born in Japan (but unfortunately he's not actually Japanese, it was a military base). I also love sewing, but not anything that is too incredibly difficult, I'm fairly a newbie and self-taught for the most part. A couple years ago a friend of mine introduced me to this cute craft book by Aranzi Aronzo called The Cute Book .
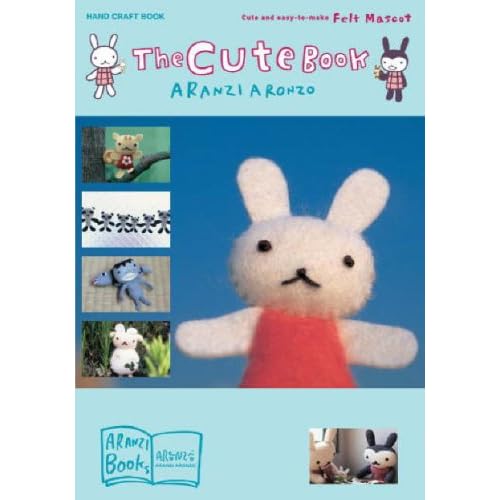
If you aren't that great at sewing, and you happen to have felt (which is one of the most inexpensive things you can buy at the fabric store!) you can make these cute little dolls!

I made a panda and a lizard soon after getting the book, and then found out the author has even more books, including Fun Dolls.
This book is even more amazing, and it really is seriously CUTE! The Fun Dolls book has patterns for larger dolls and gives you the option to work with some different fabrics, like fleece, which are super easy to work with for beginners like myself!

I had the opportunity to make two of these cute dolls for a couple of cute little girls a couple years ago, check it out:


So if you are looking for something easy, fun, and kid-pleasing (although I won't tell if you make a billion pandas for yourself!) then these books are a MUST HAVE for your Crafting Library. You can go back to them time and time again for really unique gift ideas :)

Thursday, February 10, 2011

Fun Finds!

I think I have come to realize I use far too many exclamation points when I write. If only the internet could just capture emotion through my keyboard.....


Anyway!! (teehee)

I find fun stuff online all the time. It's one of the benefits of being at home most of the day. I would like to share these with you.

For instance, check out this etsy link for a sampler of AWESOME fabric! (click on the image to see the other fabrics in the sampler)


Isn't it great?! I love the vintage yet modern feel to it. What would you make with it? I never know what to make with fabric, I usually just end up making pillows. I need some new fresh ideas :)

I tried it!


I gathered up my supplies and some plain t-shirts and tried the craft project I poster earlier.


Here are my supplies ready to go:

Now, I realized that I didn't have the EXACT supplies that were mentioned in the blog, but I figured I was fine. Turns out I was not!!!

Words of wisdom - if you are going to try this this weekend USE THE SAME FABRIC PAINT she uses on the blog. Also buy yourself one of those paint rollers. And another tip - go for white or light colored t-shirts! These two were the only ones I had on hand.

After trying to do my shirt the way that the directions told, I figured out that the paint was just not transferring thick enough to show up on my shirt and the detail wasn't right. I then improvised and decided to do more of a stenciling approach to save my shirt. Instead of painting the doily and pressing it, I just put the doily down onto the shirt in one spot and painted in the negative space and some around the edges (think of it like making a negative of the original design). The results are as follows:


So, as you can see, not exactly as easy as I thought it would be, but you will never know unless you try! I would say it's not a total disaster, and I will probably wear my shirt along with my daughter on Valentines day. And I didn't really lose any money, I already had the shirts, the paint, and the brush, the doilies I bought today for $1.75.

The lesson for today is this : Who cares if your stuff doesn't turn out perfect! Just try it if you want to try it!!! You will be surprised how much you learn from every crafting experience :)


Valentine's Day Craft

Okay, so I know my first actual crafty post probably shouldn't be something that I haven't actually made, but hey, I intend to try and make this on the weekend if I have time and some plain t-shirts. We've been iced/snowed in a few times and I've been too busy to get out and get the supplies.
But really, this craft looks fun, and easy, and SUPER CUTE!! One of my friends has already tried it with great success, so if you are looking for something unique to make for your sweeties check out this craft that I found:

HEART DOILY TSHIRTS!


You can find all of the instructions on The Artful Parent Blog .

And if I ever get around to making some for me and my daughter this weekend I will be sure to post pictures!


Wednesday, February 9, 2011

Welcome!!!

I thought I would start this blog to document my journey into the world of being crafty! Over the past 5 years I have grown to love my role as a wife and stay-at-home mother to my kids. While enjoying my downtime and playing with my children, I got the itch to do something more, something creative, something........CRAFTY! There's something to be said about having children and reverting back to childhood. Something about finger painting and macaroni art that just screams out "Hey! This IS fun!"

And this is where my journey began. You see my Mom was not quite the "crafty" type. She preferred making reservations over recipes, never owned a sewing machine, and never really handmade a gift for anyone's special occasion. Now don't get me wrong, she's a GREAT ARTIST!! She can draw and paint like no one's business, and some of her artwork adorns the walls of my home at this very minute. But I think when I got married, had kids, and joined this wonderful family of friends known as the SAHM (Stay at Home Moms), I was drawn into a whole different and exciting world of creativity!

Many of my friends are what I would love to call "Super Crafters". They learned the art of something from their ancestors, passed down with loving tradition. I learned that you can actually make a gift for someone's birthday, baby shower, wedding shower, graduation, homecoming, kindergarten graduation, valentines, justbecauseIlikeyou........etc, etc, etc.

So, the long and short of it is I have learned how to sew and own a sewing machine. I have learned (and am still learning) how to cook and make desserts with flair! I have taken the inspiration of my Mom and taken a jab at painting. I own Martha Stewart craft products and I know how to use them, along with my supply of felt, hot glue gun, little fuzzy balls, and pipe cleaners!!

So follow me along on my journey of learning to be crafty! I will share with you all of the wonderful (and maybe not so wonderful) things I have made with my own hands, as well as other ideas that I find online to inspire you to Learn to be Crafty!!